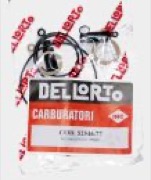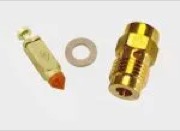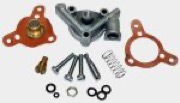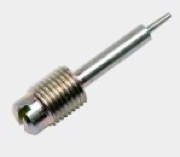
After a long lay-up or many miles a Dell'Orto often doesn't run as it should. The engine starts badly, needs the choke all the time, the carburettor overflows or the idle is uneven. Usually a thorough clean is enough. If parts are worn, it gets an overhaul. Here is how to go about it and which parts you need.
Clean or overhaul?
| Symptom | Likely cause | What helps |
|---|---|---|
| only runs on the choke, no clean idle | idle jet or idle passages blocked | cleaning |
| carburettor overflows, fuel drips | float valve dirty or worn, float leaking, float level wrong | new float valve, check float |
| fuel at the float bowl | float bowl gasket hard or cracked | gasket set |
| flat spot when opening the throttle (PHF, PHM) | accelerator pump diaphragm hard or cracked | new pump diaphragm |
| gets richer at part throttle over time | needle and needle jet worn | new needle and needle jet |
| slide rattles, idle won't hold | slide or body worn | new slide, check body |
Before you strip it
Note down or photograph what is fitted: jet sizes, needle and notch, needle jet, slide and the mixture screw setting. Count the turns as you screw the mixture screw in until it seats. Then compare everything with your model's factory jetting. On twins, keep each carburettor's parts together. Some models are jetted differently left and right from the factory. Ideally strip one carburettor at a time. Then you have the other as a reference when you forget where a part goes.
Which parts wear
The workshop manual of the Moto Guzzi Le Mans II lists every single part of the PHF 36. An overhaul usually comes down to a few of them:
- Gaskets: float bowl, covers, jet holder, pump cover and mixture screw. They come in the gasket set.
- Float valve: the tip wears a groove over time. Then it no longer seals and the carburettor overflows.
- Float: if it leaks it gets heavier, sits lower and the fuel level rises. Put it on a letter scale: if it weighs more than it should, it has soaked up fuel. For the Le Mans II the manual specifies 10 g floats.
- Diaphragm of the accelerator pump on PHF and PHM.
- Needle and needle jet: they rub against each other and wear. Experienced owners on the Laverda forum replace both at every overhaul.
- Mixture screw: if the tip is bent or worn, idle can no longer be set finely.
- Fuel filter in the union: it clogs with dirt from the tank.
- Slide: if it is badly worn, fit a new one. Laverda owners report that new slides must be modified before they work in older PHF bodies, because the shape at the bottom has changed. Otherwise the slide sits too high and the idle won't come down far enough. Compare old and new slide before fitting.
How to clean it properly
- Remove the carburettor and clean the outside first so no dirt falls into the passages.
- Remove the float bowl, the float with its pin and the float valve.
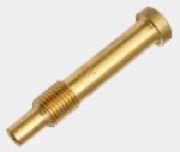
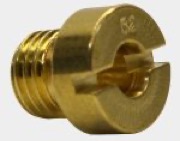
- Unscrew the main, idle, starter and pump jets; remove needle and slide.
- Take out all rubber and plastic parts before any cleaner touches the body: gaskets, O-rings, diaphragm, float. Solvents attack them. Don't forget the small O-ring on the mixture screw.
- Soak body and jets in carburettor cleaner or clean them in an ultrasonic bath. In an ultrasonic bath use a cleaner that is safe for aluminium. Some cleaners attack the body.
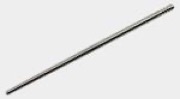
- Blow all passages through with compressed air, especially the fine idle passages. Check that air really comes through. Don't rely on the ultrasonic bath alone: after a long lay-up the idle passages are often blocked with gummed fuel. Also spray them through with carburettor cleaner using the extension tube, then blow them out.
- Never ream a jet with wire or a drill. The hole is the jet size. If it gets bigger or scratched, the jetting is wrong. For the fine passages in the body some people use a thin guitar string or a cleaning needle, but only to loosen dirt and without force. If a jet won't come clear, replace it.
Reassembly and float level
Fit new gaskets on reassembly, even if the old ones look fine. Tight O-rings go on more easily with a trace of silicone grease. The pump jet fits only one way round, so note how it sat when you removed it. Then check the float level. Every jet size depends on it. For the PHF 36 on the Le Mans II with 10 g floats the workshop manual gives 23.5 mm, measured from the body's gasket face to the top of the floats. For other carburettors use the figure in your manual.
Measure when the float is just closing the float valve. The tip of the float valve is spring-loaded. If you tilt the carburettor further, the float compresses this spring and the reading is wrong. If you have replaced the float valve, always measure again. Even the sealing washer under the valve seat changes the float level.
Set the mixture screw back to the turns you counted when stripping it, or to the basic setting from the manual. On twins, rebalance the carburettors afterwards as described in Balancing carburettors.
Checks after fitting
- Turn the fuel tap on and wait. If nothing drips, the float valve is sealing.
- If a carburettor still overflows with new parts, check whether the float rubs on the bowl or binds on its pin. A trick from the Guzzi forum: swap the floats between left and right carburettors. If the fault moves with it, it's the float.
- Check the accelerator pump: engine off, fuel tap on, air filter removed, then open the throttle briskly. A strong jet of fuel must come out of the pump jet, the same on both sides. After stripping, the pump first has to draw fuel again, so work the throttle a few times before you judge it.
- Start the engine and warm it up. The idle should be steady and the engine should run without choke.
- Read the plugs after a test ride, as described in Reading spark plugs.
- If something isn't right, work in the order given in Tuning a Dell'Orto.
Where this information comes from
The float level and the parts list are from the Moto Guzzi 850 Le Mans II workshop manual, carburettor chapter. We checked the practical tips against reports from experienced owners: on LaverdaForum (float level) and GuzziTech (overflowing carburettor, accelerator pump).
Which gasket set fits my carburettor?
The matching parts for your carburettor are on your motorcycle's page in the jetting database. If in doubt, send us a photo of the type marking on the carburettor and we'll check.